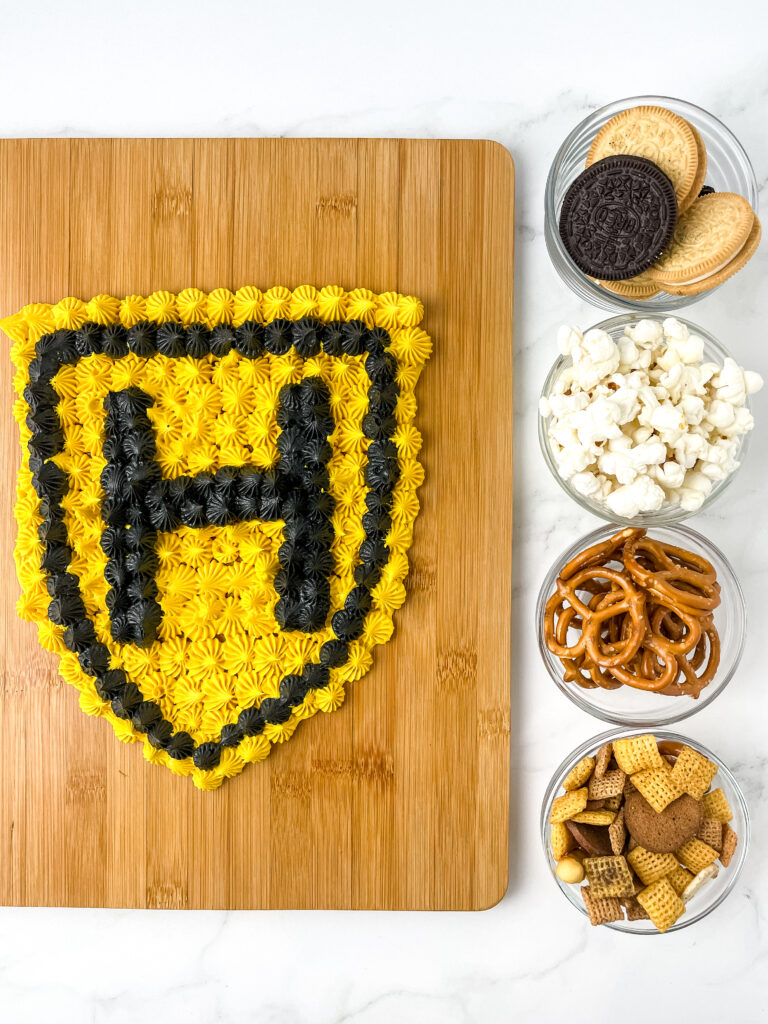
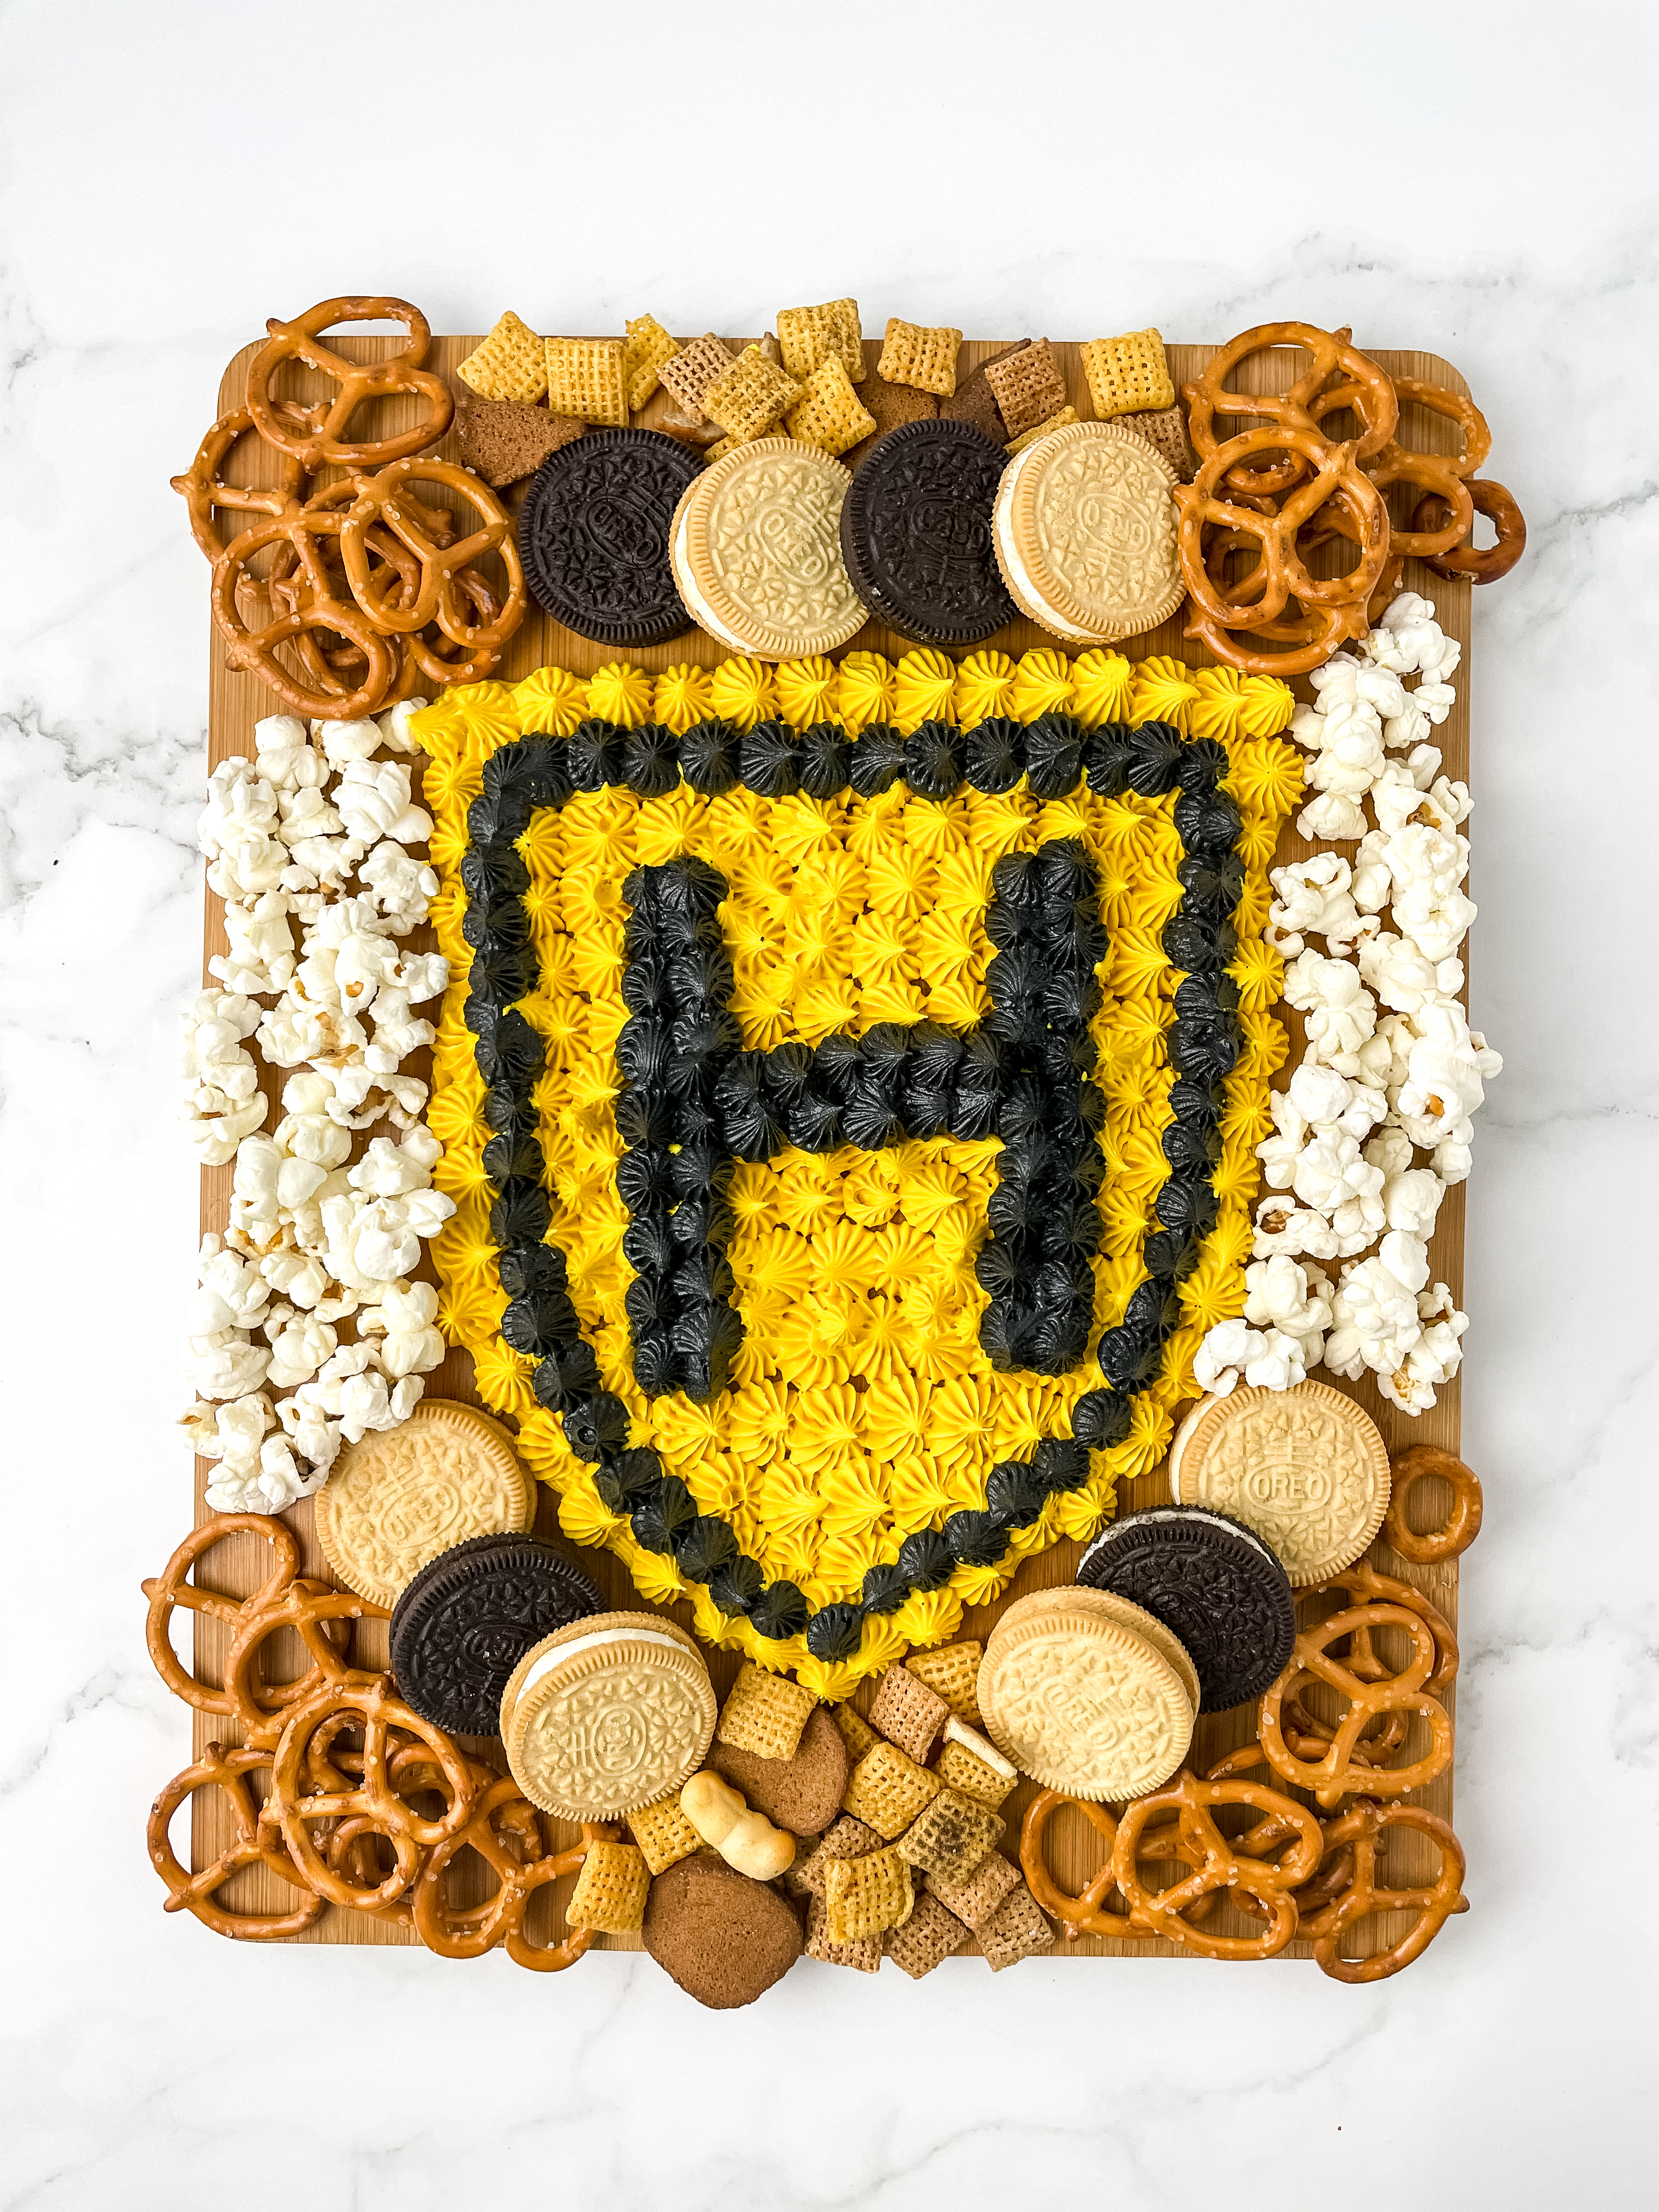
Craft a magical HP Hufflepuff Badge Buttercream Frosting Board, celebrating Hufflepuff house’s loyalty, patience and love of food.
For the Harry Potter Enthusiasts
Are you a die-hard Harry Potter fan? Do you dream of receiving your very own Hufflepuff badge? Well, hold onto your wands, because we’re about to bring the magic to your kitchen! This recipe, we’ll unravel the secrets behind creating a mesmerizing Harry Potter Hufflepuff Badge Buttercream Frosting Board that’s not only visually captivating but also a true treat for the senses. It’s a fantastic way to immerse yourself in the world of Harry Potter while indulging in some delicious treats.
The Harry Potter Hufflepuff Badge Buttercream Frosting Board is a creative masterpiece that not only pays homage to the beloved Hufflepuff house but also showcases your baking skills. With its vibrant yellow and black colors, it’s the perfect centerpiece for any Harry Potter-themed event, from birthdays to movie marathons.
Conjuring the Ingredients and Equipment
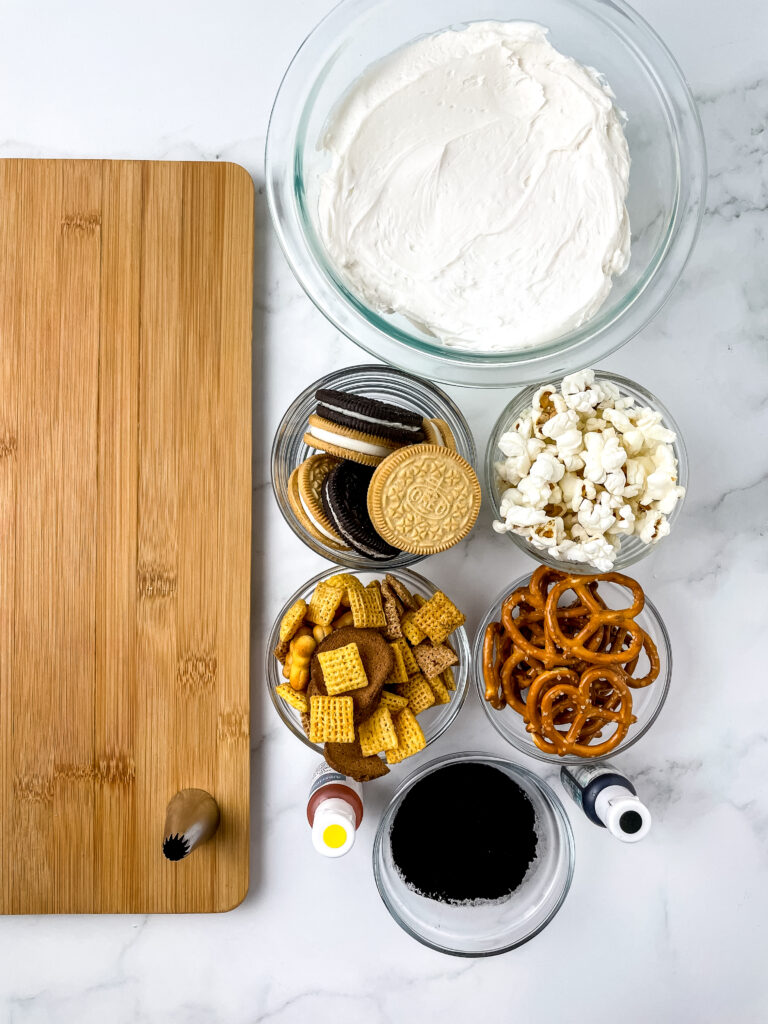
Before you begin, make sure you have the necessary magical tools at your disposal. Here’s what you’ll need:
Equipment:
- Measuring Cups
- Measuring Spoons
- Large Bowl
- Small Bowl
- Spatula
- Piping Bags
- Scissors
- 4B Piping Tip
- Cutting Board
Ingredients:
- 9 oz of Buttercream Frosting
- Oreos (Chocolate and Vanilla)
- Popcorn
- Pretzel Bows
- Chex Mix
- 1-2 Teaspoon of Dutch Black Cocoa Powder
- Yellow Food Gel Color
- Black Food Gel Color
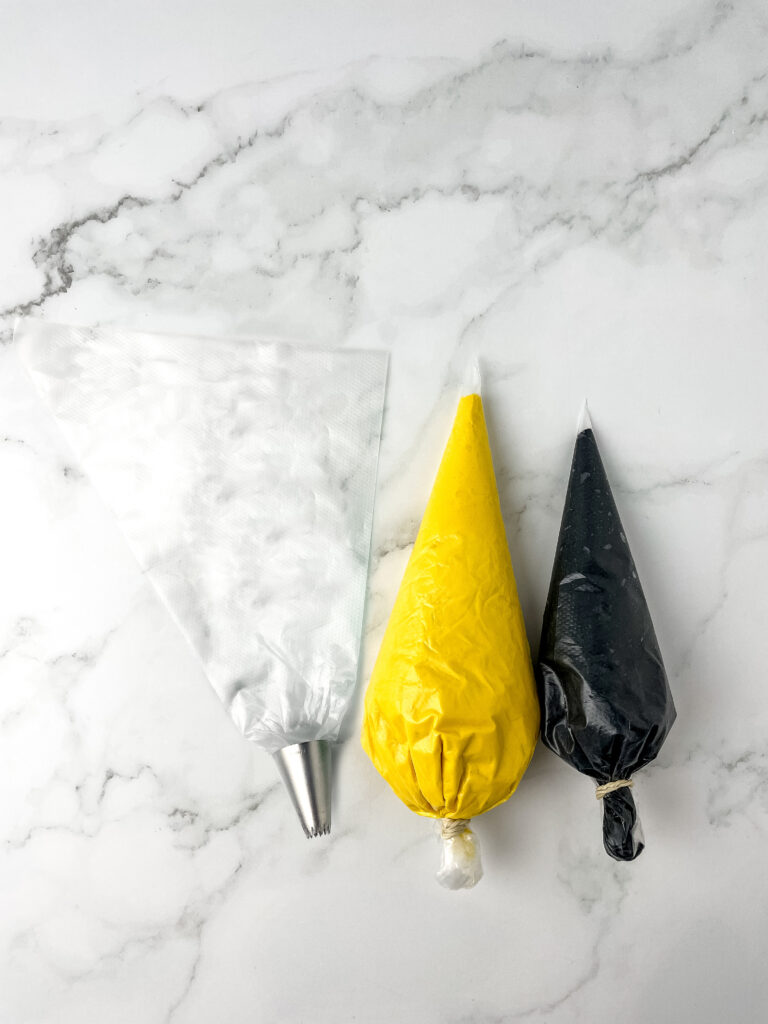
Brewing the Magic: Step-by-Step Instructions
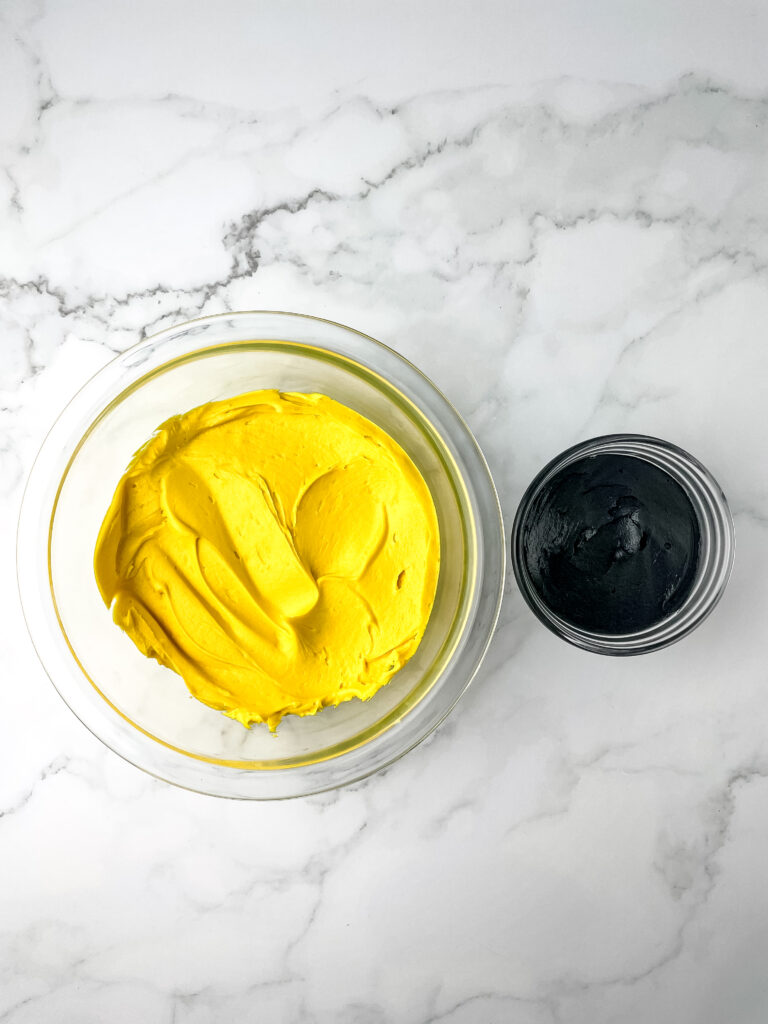
1. Begin by dividing your buttercream frosting into two bowls, reserving a 1/3 portion in a smaller bowl.
2. To the larger bowl, add 5-7 drops of yellow food gel color and mix until the frosting turns a vibrant shade of yellow.
3. In the smaller bowl, incorporate black cocoa and 3 drops of black gel color to create a rich black frosting. Allow it to sit covered for 20 minutes if needed.
4. With your yellow and black frostings, prepare three piping bags – one for each frosting color and a third for the piping tip.
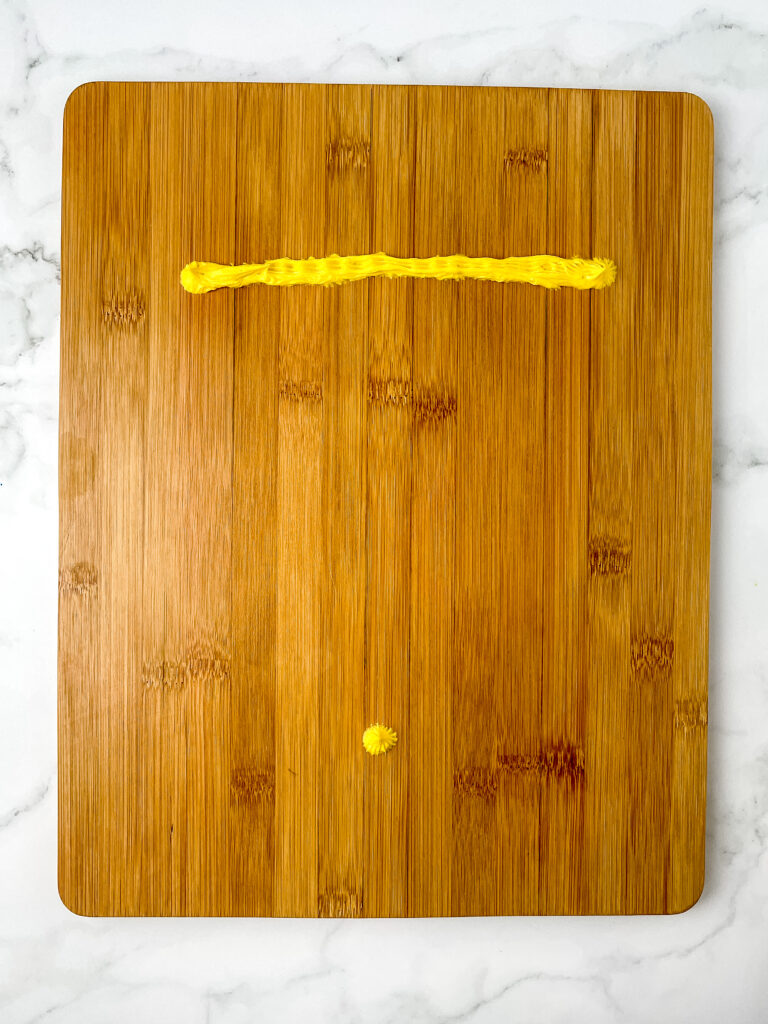
5. Lay the groundwork by marking the board with the yellow buttercream frosting, designating the area for the badge.
6. Craft a straight line across the board using the yellow frosting to define the badge’s boundaries.
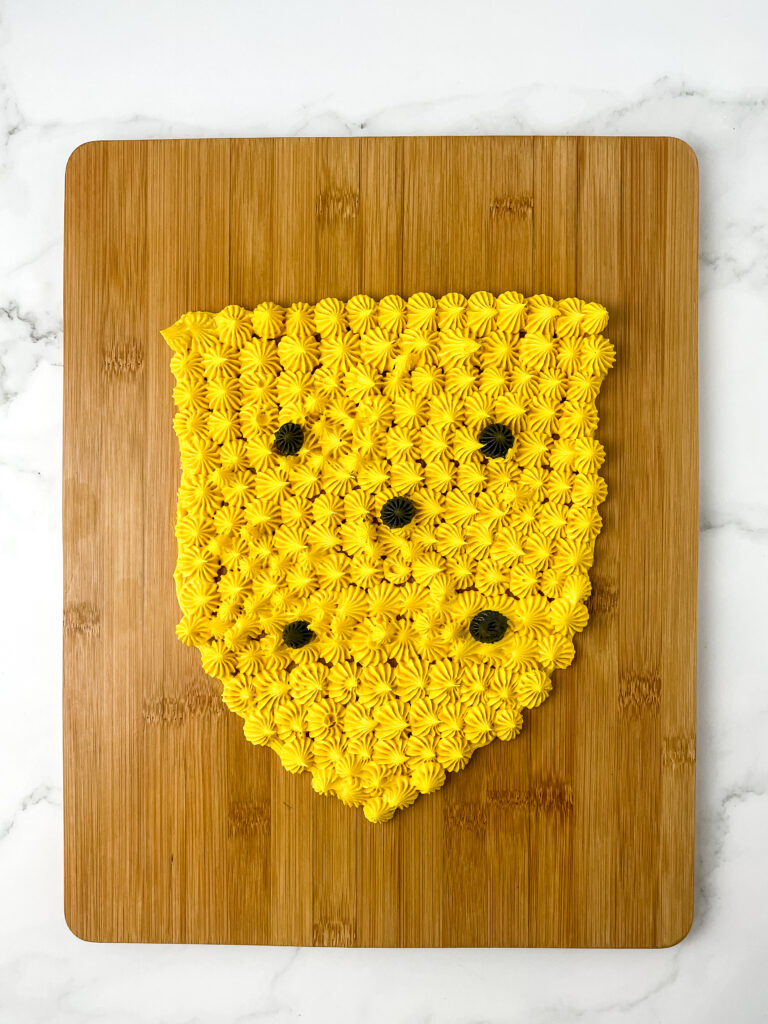
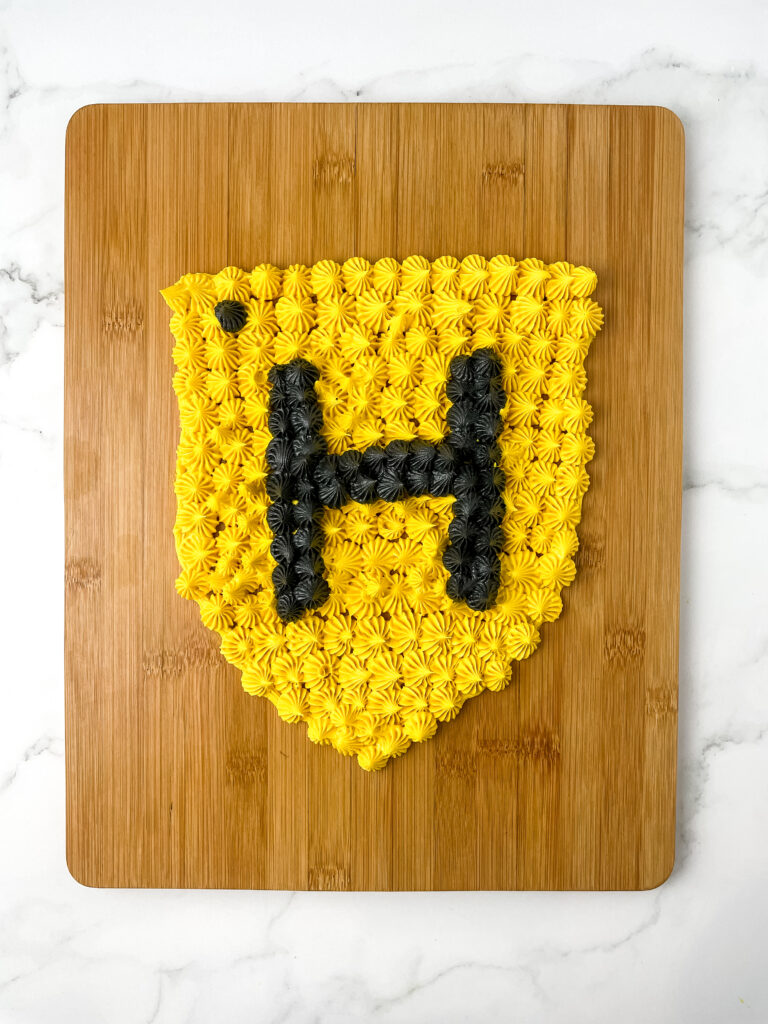
7. At the bottom-center of the board, create a small dot to guide the badge’s completion.
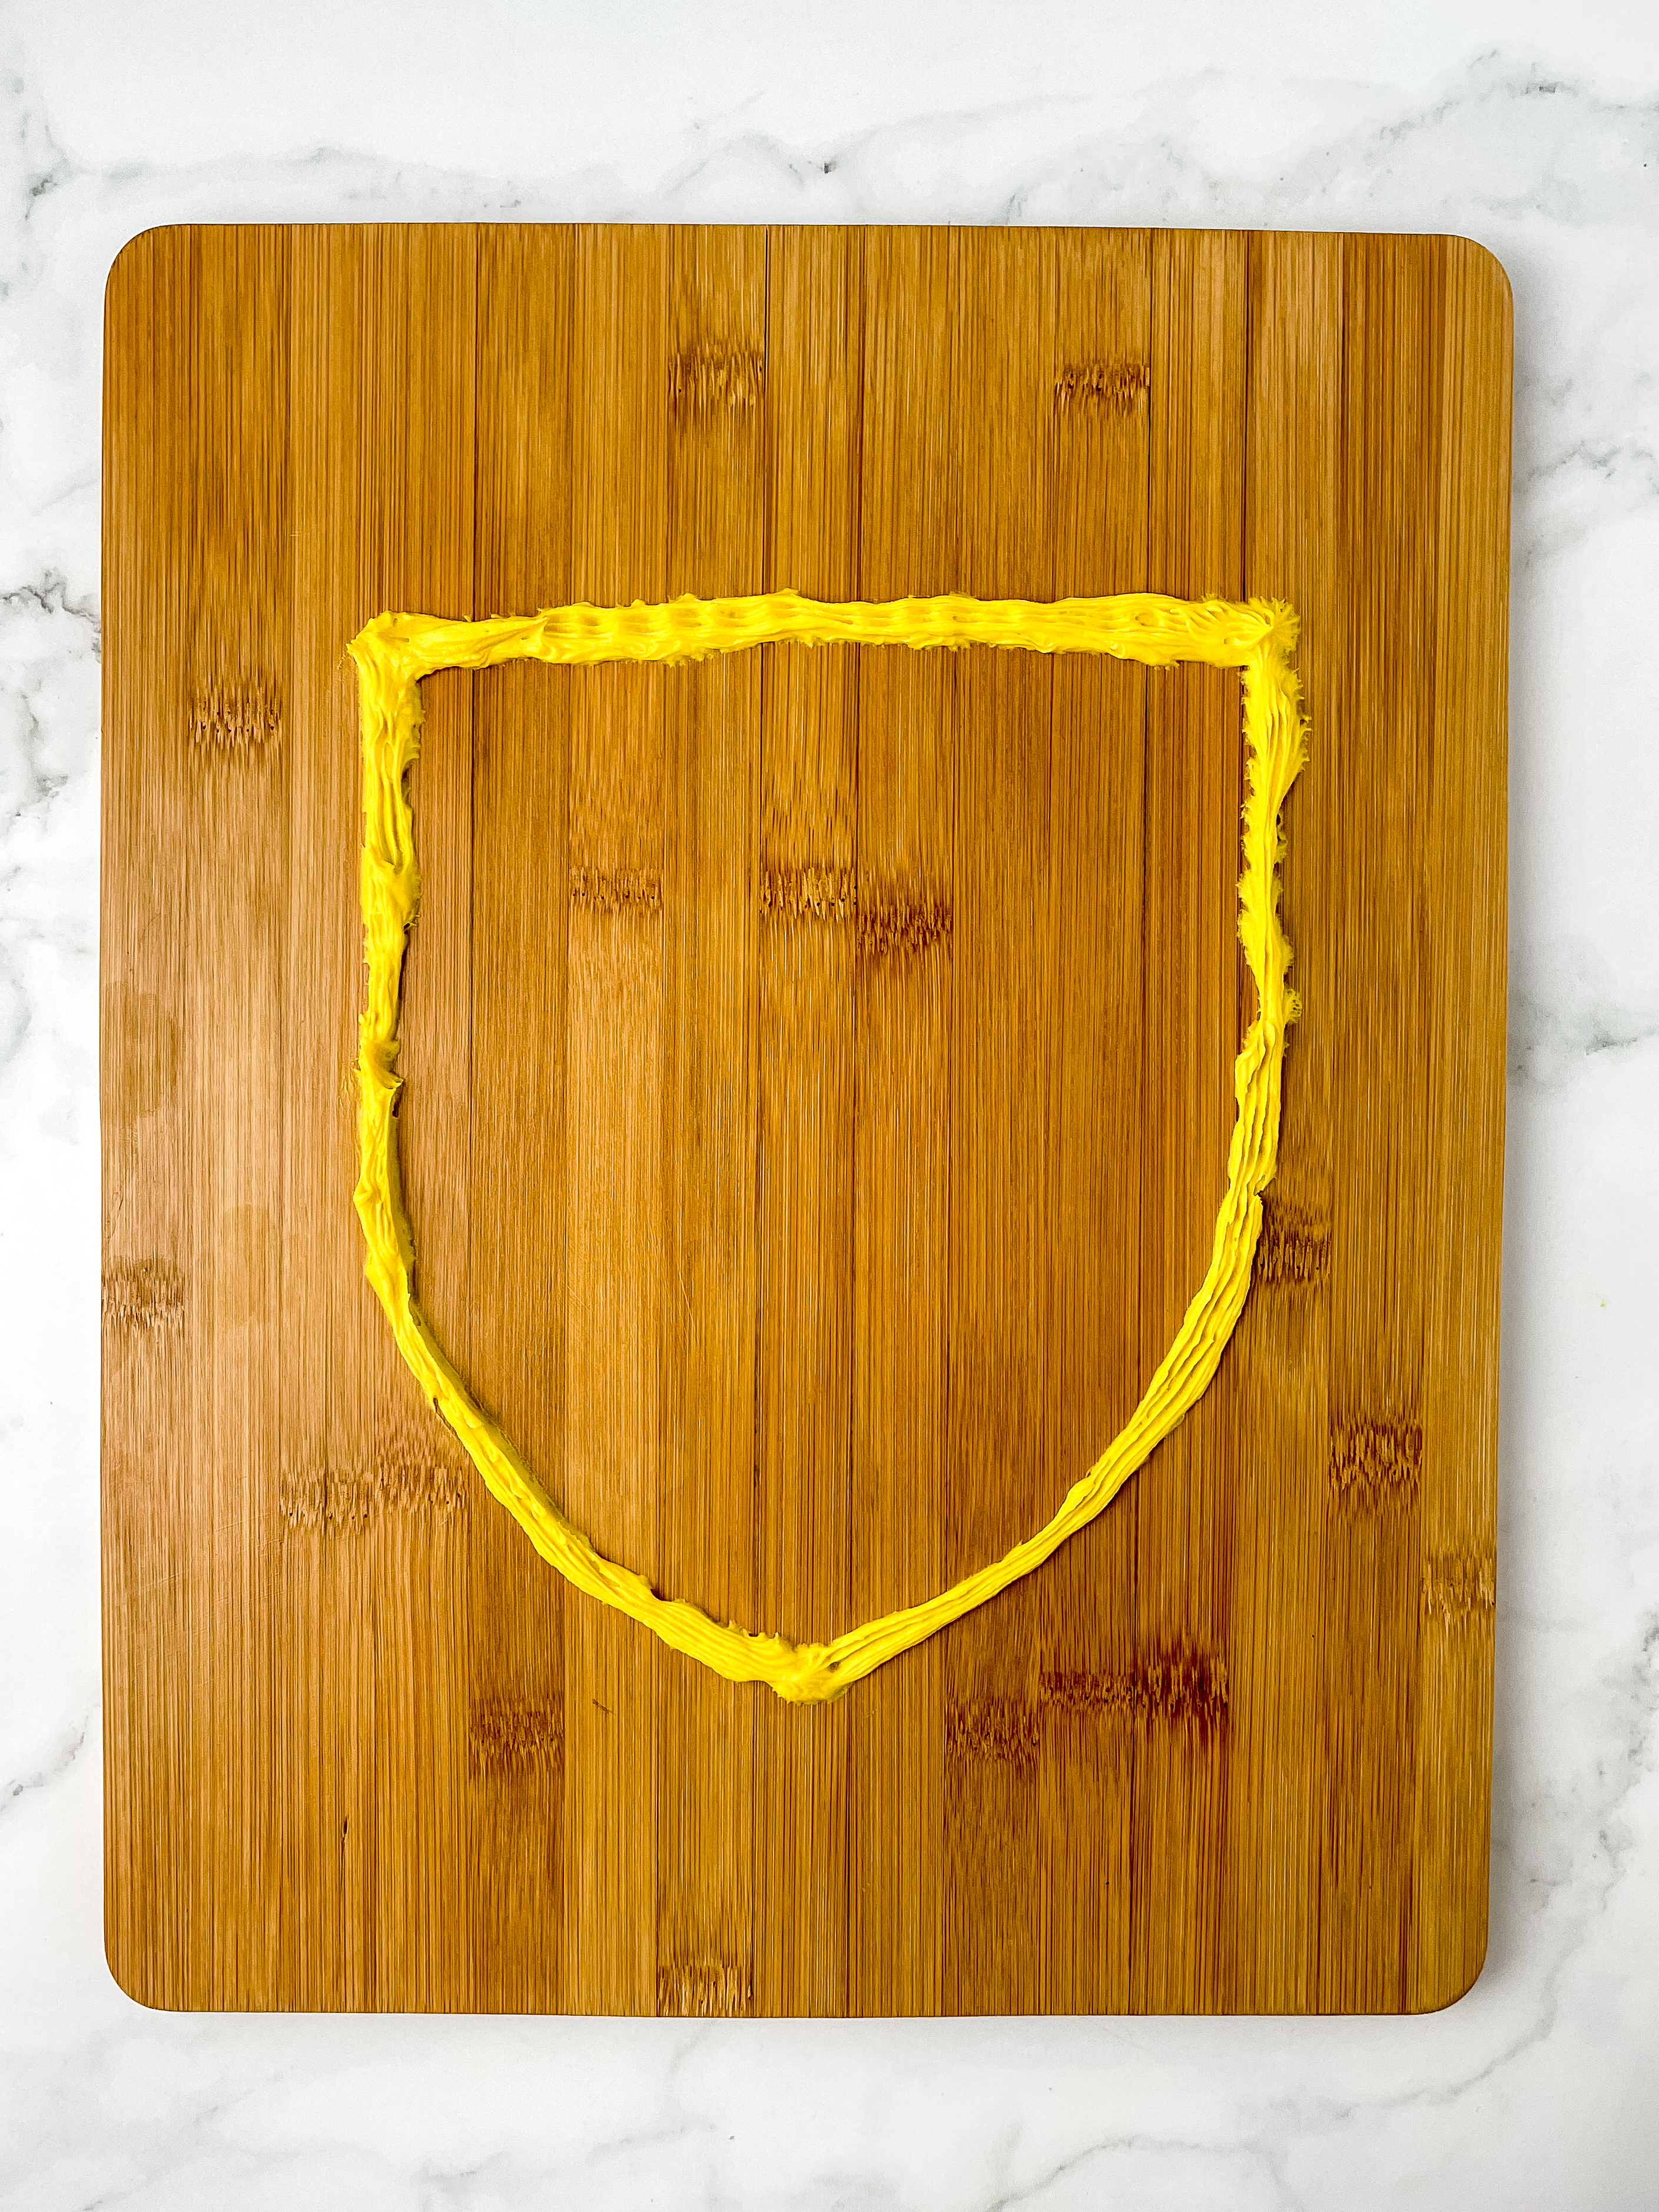
8. Form the badge’s outline by drawing lines from the end of the top line towards the bottom-center dot, curving them as you reach the midpoint.
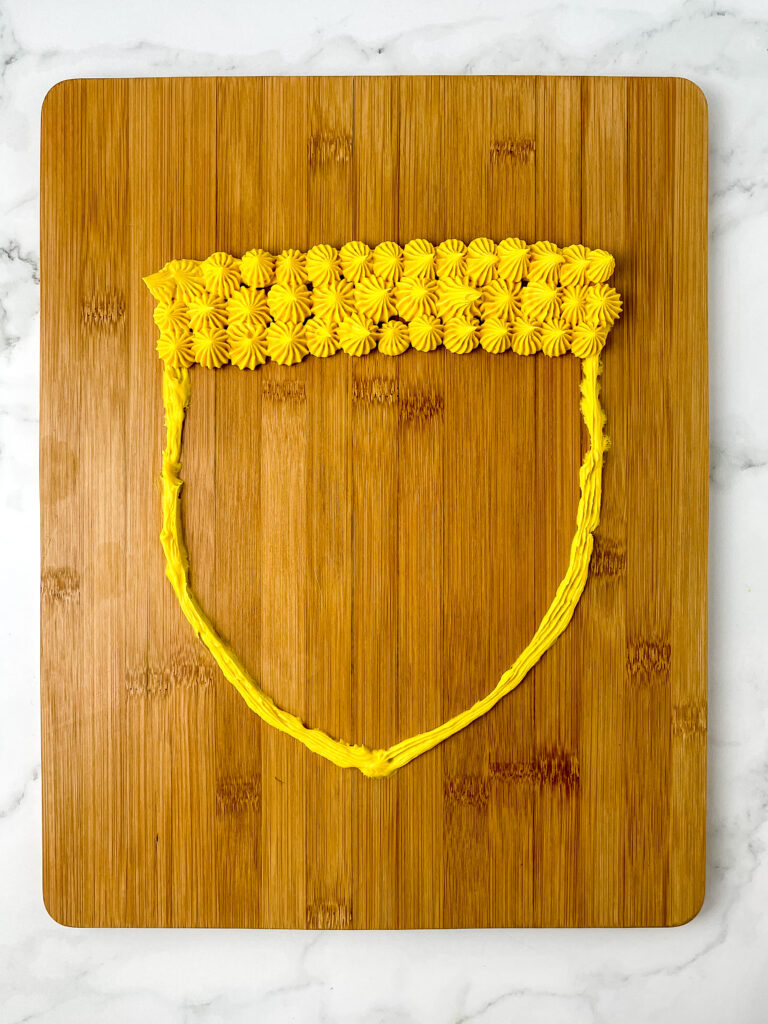
9. Fill the badge’s shape by using the yellow frosting piping bag to create dots along the marked lines.
10. Switch to the black frosting by swapping the yellow bag and squeezing the black frosting over a paper towel.
11. Use the black frosting to outline and form the letter “H” within the badge, using the dot technique.
12. Trace the inside of the badge with the black frosting for added definition and charm.
13. Once your Hufflepuff frosting Board is complete, it’s time to adorn it with a mixture of enchanting snacks. Arrange Oreos, popcorn, pretzel bows, and Chex Mix in a festive manner around the badge. This board serves 10-12 individuals, making it perfect for sharing the magic with friends and family.
Tips and Tricks to Elevate Your Creation
- Shortcut for Piping Bags: If you’re using multiple piping tips, you can skip the third piping bag step and directly attach the tip to one of the frosting bags.
- Enhancing the Black Frosting: The optional Dutch Black Cocoa Powder not only makes a deep black color but also adds a delightful flavor to your frosting.
Storing the Spellbinding Creation
To preserve the buttercream frosting , store any leftovers in an airtight container in a cool, dry place. This will keep your buttercream frosting and snacks fresh and ready for another journey into the wizarding world.
Food and Drink Pairings
For the ultimate magical experience, pair your Harry Potter Hufflepuff Badge Buttercream Frosting Board with a cup of Butterbeer or a glass of Pumpkin Juice. These wizarding world beverages are sure to complement the sweetness of your creation.
Share the Magic!
Are you ready to embark on an adventure that fuses the enchantment of Harry Potter with delectable treats? Whether you’re a novice witch or a seasoned wizard in the kitchen, this recipe promises to bring joy and excitement to your next gathering. Don’t keep this enchanting secret to yourself – share the recipe with fellow Harry Potter fans and subscribe to our blog for more delightful creations. Remember, the magic is in your hands!
This post contains affiliate links. If you purchase from some of these links I will receive a small commission but it will Not add any additional cost to you.
